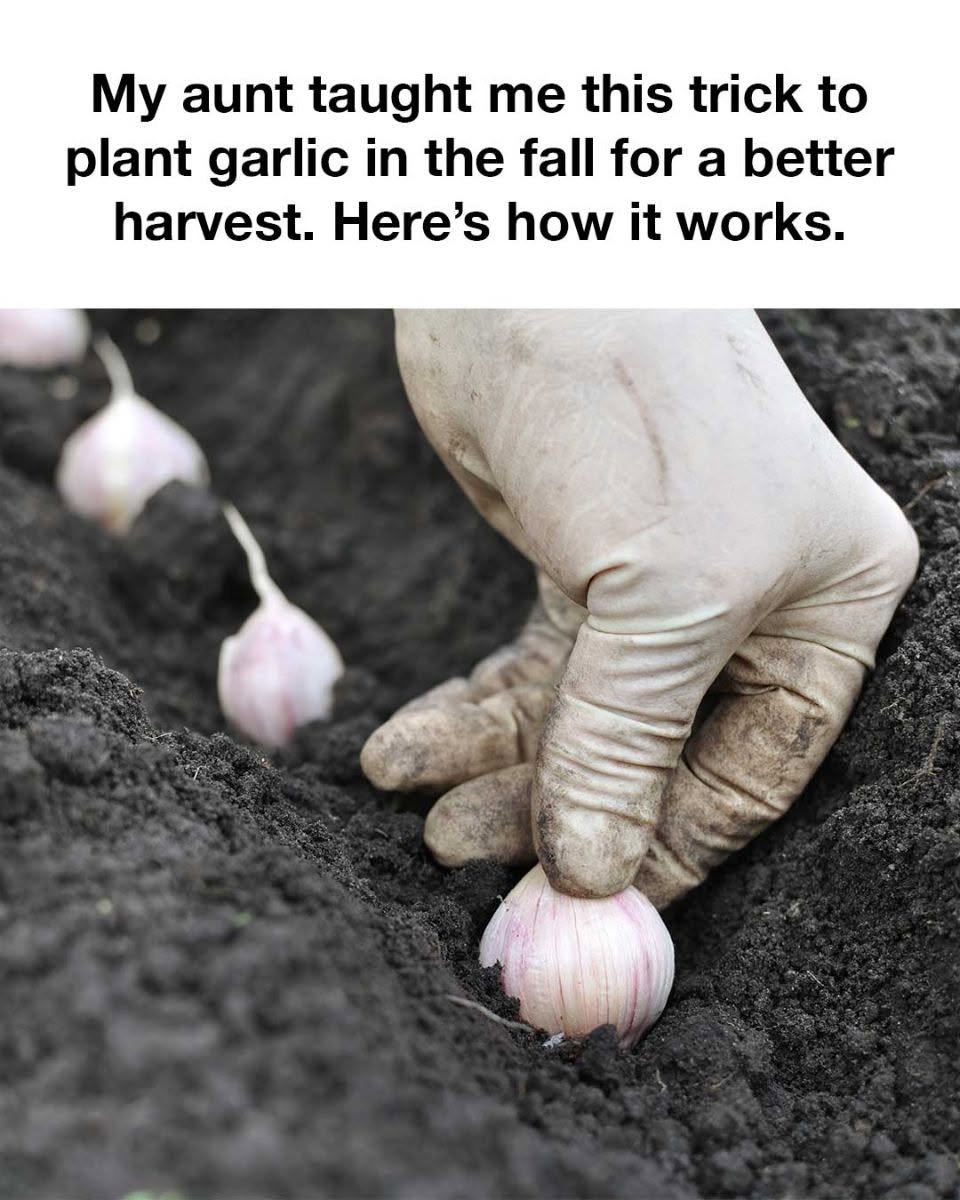
Planting Your Garlic in the Fall: Step-by-Step
Once you’ve prepared your garlic cloves, it’s time to plant. Here’s the process to follow for the best results:
1. Choose the Right Time to Plant
The ideal time to plant garlic is about 4–6 weeks before your ground freezes, typically between late September and early November, depending on your climate. This timing allows the garlic to establish roots but not sprout before winter.
2. Prepare the Soil
Garlic thrives in rich, well-drained soil with plenty of organic matter. Before planting, loosen the soil to a depth of at least 6 inches and mix in compost or well-rotted manure. This provides the garlic with the nutrients it needs to develop strong roots.
3. Plant the Cloves
Plant each garlic clove pointy side up, root side down, about 2 inches deep and 4–6 inches apart. If you’re planting multiple rows, space the rows about 12 inches apart to give the plants room to grow. Cover the cloves with soil and gently firm the ground around them.
4. Mulch Generously
Once your garlic is in the ground, cover the area with 3–4 inches of mulch. My aunt swears by straw or shredded leaves as they provide excellent insulation through the winter while allowing moisture to reach the garlic. Mulching helps regulate soil temperature, keeps weeds at bay, and protects the garlic from winter frost.
5. Water Wisely
Garlic needs moisture to grow, but it doesn’t like to be waterlogged. After planting, water the bed deeply to help the garlic establish roots. Once winter arrives, you can stop watering since the garlic will be dormant. In spring, resume regular watering when you see the green shoots emerge.
Caring for Garlic Through Winter and Spring
Garlic is relatively low-maintenance, but a few simple practices will help ensure a bumper crop.
1. Monitor the Mulch
Check your garlic bed periodically to ensure the mulch stays in place through the winter. If you experience heavy snow or rain, add more mulch as needed to keep the cloves insulated.
2. Fertilize in Spring
Once the garlic begins growing in the spring, it’s a good idea to feed it with a high-nitrogen fertilizer, like fish emulsion or blood meal. This will give the plants the nutrients they need to produce large, healthy bulbs.
3. Keep the Bed Weed-Free
Garlic doesn’t like competition from weeds. As the plants grow, check the bed regularly and pull any weeds you find to ensure the garlic gets all the sunlight and nutrients it needs.
Harvesting and Storing Your Garlic
By mid-summer, your garlic will be ready for harvest. You’ll know it’s time when the lower leaves turn brown but the upper leaves are still green. Use a garden fork to gently lift the bulbs out of the ground—don’t pull them up by the stalks, as this can damage the bulbs.
Once harvested, lay the garlic bulbs out in a well-ventilated, dry area to cure for 2–4 weeks. After curing, brush off any dirt, trim the roots, and store your garlic in a cool, dry place. Properly cured garlic can last for months, providing you with flavorful cloves all winter long.
Conclusion: A Simple Trick for a Bountiful Harvest
My aunt’s trick of soaking garlic cloves before planting transformed my garlic-growing experience. It’s a small step that makes a big difference, promoting healthy root development and protecting the cloves from disease. Paired with proper soil preparation, fall planting, and a good mulching routine, this method leads to a garlic harvest that’s larger, more flavorful, and easier to grow.
If you’re a garlic lover looking to up your gardening game, try this fall planting technique, and you’ll be rewarded with a more abundant harvest next summer!
For Complete Cooking STEPS Please Head On Over To Next Page Or Open button (>)