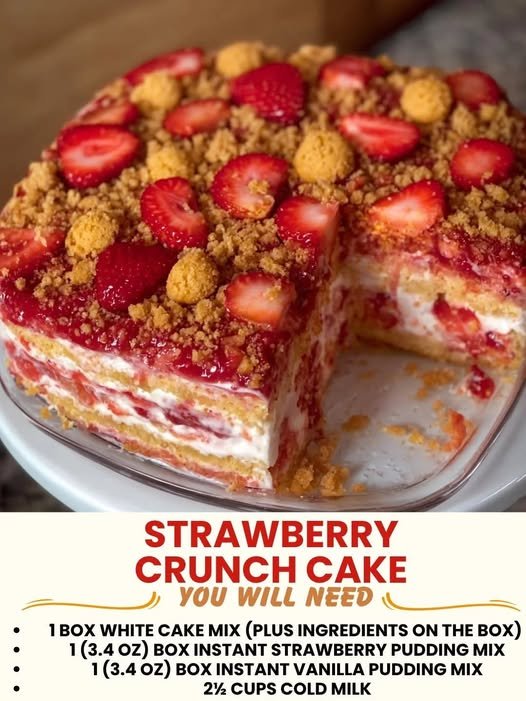
I love this cake as is, but I also love playing around with it. Here are my favorite tweaks that I’ve tested and genuinely enjoyed.
Lemon Strawberry Version: Add the zest of one lemon to the cake batter and use lemon extract instead of vanilla. The brightness pairs beautifully with strawberries, and it feels a little fancier without being complicated.
Almond Crunch: Swap half the oats in the topping for sliced almonds. Toast them lightly first if you have time, and your topping becomes something really special.
Coconut Twist: Mix 1/2 cup shredded coconut into the crunch topping. It adds a tropical vibe that works surprisingly well with strawberries.
Brown Butter Cake: Brown your butter before mixing it into the cake batter. It adds a nutty depth that makes the whole thing feel more sophisticated.
Step-by-Step Method
Step 1: Prep Your Pan and Preheat
Preheat your oven to 350°F. Grease a 9×13-inch baking pan with butter or cooking spray, then line the bottom with parchment paper. I know it seems like extra work, but it makes cleanup so much easier, and your cake comes out perfectly.
Step 2: Make the Cake Batter
In a small bowl, whisk together your flour, baking powder, and salt. Set it aside. In a larger bowl, cream your softened butter and sugar together until it’s light and fluffy, about 2-3 minutes. This matters more than you think—you’re incorporating air into the batter, which makes the cake tender.
Beat in your eggs one at a time, then add the vanilla extract. Alternate adding the dry ingredients and the milk, starting and ending with the dry ingredients. Mix just until combined. Don’t overmix; you’re not trying to develop gluten here.
Hailee’s What I Messed Up Moment: The first time I made this, I overmixed the batter trying to get it perfectly smooth. It turned out dense and tough. Now I stop as soon as I don’t see flour streaks anymore. Your cake will thank you.
Step 3: Prepare the Strawberries
Hull and halve your strawberries, then toss them in a bowl with 2 tablespoons of sugar. Let them sit for about 15 minutes. This draws out their juice and makes them sweeter and juicier. Yes, it’s worth the wait.
Step 4: Assemble the Base
Pour your cake batter into the prepared pan and spread it evenly. Now here’s the fun part: scatter your strawberries and all their juices over the batter. Don’t worry about them sinking—that’s supposed to happen. They’ll distribute throughout the cake as it bakes.
Step 5: Make the Crunch Topping
In a bowl, combine your oats, flour, brown sugar, and salt. Add your cold butter cubes and use your fingers to work it together until it looks like coarse breadcrumbs with some pea-sized pieces of butter still visible. This is important—those little butter pieces are what create the crunch.
Step 6: Top and Bake
Sprinkle the crunch mixture evenly over the strawberries and batter. Don’t press it down; let it sit loosely on top. Bake for 35-40 minutes, until the top is golden brown and a toothpick inserted into the cake part (not a strawberry) comes out clean or with just a few moist crumbs.
Step 7: Cool and Serve
Let the cake cool in the pan for at least 20 minutes before cutting. I know it’s tempting to dig in right away, but this cooling time helps everything set so you get clean slices instead of a crumbly mess. If you can wait longer, even better—this cake is honestly delicious at room temperature or even slightly chilled.
Common Mistakes to Avoid
Using Overripe Strawberries: I love ripe strawberries, but if they’re too soft, they’ll turn to mush in the oven. Look for strawberries that are bright red and still have a little firmness to them.
Warm Butter in the Topping: I mentioned this already, but it’s worth repeating. Warm butter won’t create that crispy texture you’re after. Keep it cold.
Skipping the Parchment Paper: This isn’t a mistake that ruins the cake, but it does make cleanup harder. Just use it.
Overbaking: Every oven is different, so start checking at 35 minutes. Overbaking dries out the cake, and that’s the opposite of what we want.
Not Letting Strawberries Macerate: Those 15 minutes really do matter. It’s not just for flavor; it’s about texture and juice distribution.
My Tested Substitutions
For Complete Cooking STEPS Please Head On Over To Next Page Or Open button (>)